
As a virtual assistant, having a professional website is crucial for attracting clients and showcasing your services. Elementor is an excellent tool for building a stunning WordPress site from scratch, even if you have little to no design experience. In this step-by-step guide, we’ll walk you through the process of setting up your website using Elementor templates, along with some tips to make your site stand out.
Step 1: Choose Your Hosting Provider
Before you can start building your website, you’ll need to choose a reliable hosting provider. Good hosting ensures that your website runs smoothly, loads quickly, and is secure. For a seamless experience, consider using Elementor Hosting, which is specifically designed for WordPress sites. It integrates perfectly with Elementor, offering fast performance and ease of use, making it an ideal choice for virtual assistants.
Step 2: Install WordPress and Elementor
Once you’ve set up your hosting, the next step is to install WordPress. Most hosting providers offer a one-click installation process, making it easy to get started. After WordPress is installed, you’ll need to add the Elementor plugin. For advanced features and a wider selection of templates, we recommend upgrading to Elementor Pro, which offers powerful tools to help you create a truly professional website.
Step 3: Choose an Elementor Template
Now that you have Elementor set up, it’s time to pick the perfect template to showcase your virtual assistant services. The right template can make all the difference in presenting a professional image.
We offer a range of Elementor templates tailored specifically for virtual assistants. Whether you’re looking for a minimalist design to highlight your organisation skills or a vibrant layout to reflect your creativity, we have something that will suit your needs. Browse through our collection and select a template that resonates with your brand.
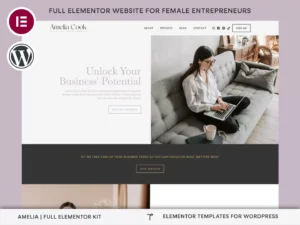
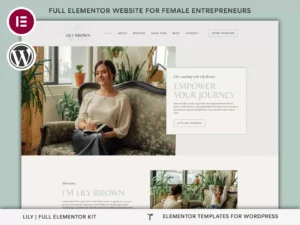
Each template is fully customisable, allowing you to tweak the design to match your brand’s colours, fonts, and style. This flexibility ensures that your website not only looks great but also feels uniquely yours.
Step 4: Customise Your Template
With your template in place, it’s time to make it your own. Elementor’s drag-and-drop interface makes it easy to customise every aspect of your site. Here are a few key areas to focus on:
- Homepage: This is the first thing visitors see, so make sure it’s engaging and informative. Include a brief introduction, highlight your services, and add a call to action to encourage potential clients to get in touch.
- About Page: Use this page to share your story, experience, and what sets you apart from other virtual assistants.
- Services Page: Clearly outline the services you offer, including any specialisations. Consider adding a pricing section if applicable.
- Contact Page: Make it easy for clients to reach you by including a contact form, email address, and phone number.
Step 5: Integrate Branding Elements
Consistency in branding is key to creating a professional image. Make sure your website reflects your brand identity by integrating your logo, choosing brand colours, and using consistent fonts. If you don’t have a logo yet, consider using a semi-custom logo template to create one that matches your brand’s personality.


Step 6: Optimise for Mobile and SEO
In today’s digital landscape, ensuring your website looks great on all devices is crucial. Elementor templates are responsive by default, but it’s essential to check how your site appears on mobile and tablet screens to provide the best user experience.
Additionally, optimising your site for search engines is key to helping potential clients find you. This is where a powerful SEO tool like SEOPress comes in. SEOPress makes it easy to optimise your content with relevant keywords, meta descriptions, and alt text for images, improving your site’s visibility in search results.
Step 7: Launch Your Website
Once you’re happy with your website, it’s time to go live! Double-check all your content, ensure that your contact forms work, and test your site’s performance. When you’re ready, hit the publish button and start promoting your new website to attract clients.
Final Thoughts
Building a professional website as a virtual assistant is easier than ever with Elementor. By following these steps and using the right templates, you can create a site that not only looks stunning but also functions smoothly. Don’t forget to leverage the power of Elementor Hosting and Elementor Pro to ensure your website performs at its best. With a polished online presence, you’ll be well on your way to attracting and retaining clients.